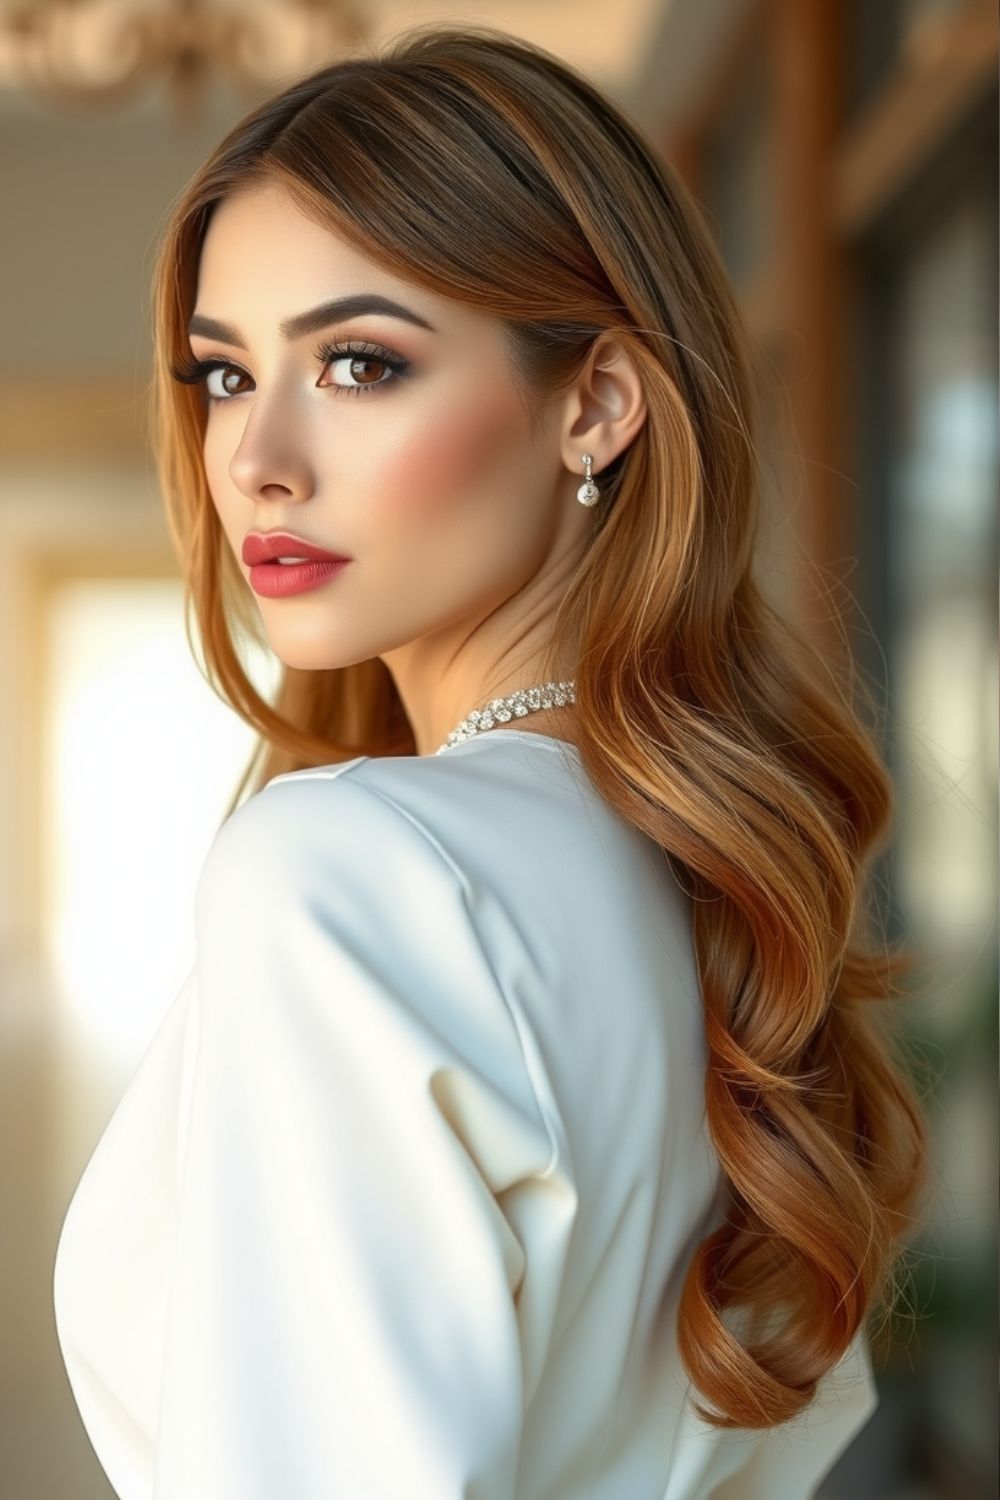
Winter is the perfect time to experiment with your hair. As the weather gets colder and the days shorter, braids can become your best friend. Not only do they keep your hair neat and secure, but they also add a fun and fashionable twist to your look. From my own personal experience, I can tell you that braids are more than just a hairstyle, they can be a statement. Whatever you plan to do, even if you’re heading out for a cozy gathering or braving the cold, a well-done braid can elevate your entire outfit. In this post, I’m going to share the top of my favorite winter braid styles, explain how to create them, and offer some tips to make them your own.
1. The Braided Bun

The braided bun is a chic and sophisticated hairstyle that combines the elegance of a bun with the intricate detail of braids. This style is perfect for brides who want to keep their hair neatly styled while still showing off a bit of texture. Whether you’re walking down the aisle, attending a formal event, or simply want a sleek yet detailed look, the braided bun delivers a perfect balance of style and function.
It works wonderfully with any hair length, though it’s especially effective for medium to long hair, as it allows for plenty of volume and intricate braiding. This hairstyle adds a unique twist to the classic bun, making it stand out in a crowd.
Styling Tips:
- Start with clean hair: Begin with freshly washed hair to make it easier to style. For added volume, use a volumizing mousse or spray.
- Create the braid: Start by sectioning off a small part of your hair from the front. Braid it into a simple three-strand or Dutch braid, depending on the look you prefer.
- Form the bun: Once the braid is complete, twist the remaining hair into a bun. You can opt for a low or high bun, depending on your preference. Pin the braid around the bun to give it that braided touch, securing it with bobby pins.
- Keep it sleek or loose: For a more refined look, keep the braid and bun tight and smooth. If you want a more relaxed vibe, pull on the edges of the braid and bun for a softer, slightly undone appearance.
- Finishing touches: Lightly spray with hairspray to ensure the style holds throughout the day or night.
The braided bun is a timeless yet modern choice for anyone who loves clean lines mixed with intricate details. Whether you’re at a wedding, a formal gathering, or simply want a stylish everyday look, this style is versatile enough to work in any setting. Plus, it’s easy to customize with accessories like pins, combs, or floral accents for a more personalized touch.
2. The Classic Dutch Braid
The Dutch braid is a simple yet chic way to keep your hair in place while making a bold statement. This style is perfect for colder months because it keeps your hair off your face, making it easy to stay warm and stylish at the same time. What makes the Dutch braid stand out is that the braid stands out from the scalp, giving it a more three-dimensional and eye-catching appearance. It’s like the reverse of the French braid, and the result is super trendy.
How to Style a Dutch Braid:
To achieve a classic Dutch braid, begin by dividing your hair into three equal sections at the top of your head. Start the braid by crossing the right section under the middle section, then the left section under the new middle section. Continue this pattern, adding hair from the sides as you go down. Once you reach the nape of your neck, secure the braid with a hair tie. If you want to add a bit more volume, gently pull at the edges of the braid to make it look fuller.
Tips for the Perfect Dutch Braid:
- Start by creating a middle part for an even braid.
- For a tighter and more polished look, braid your hair as close to the scalp as possible.
- To make the braid more relaxed and voluminous, pull the edges gently after finishing the braid.
- You can make it more interesting by adding accessories like a decorative clip or hair tie at the end.
The Dutch braid is a versatile style that works for both casual and more dressed-up occasions. Plus, it’s a great way to keep your hair out of the way when you’re busy or enjoying winter activities.
3. The Fishtail Braid
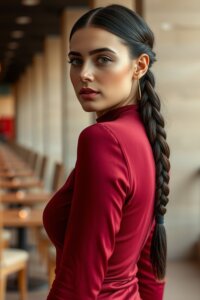
The fishtail braid is another fantastic option for winter. It’s elegant, detailed, and unique. Unlike other braids that involve three sections, the fishtail braid only requires two. This makes it stand out with its intricate, woven design. The fishtail braid is perfect for any occasion, whether you’re running errands, attending a winter wedding, or just want a chic, yet simple look for a day out.
How to Style a Fishtail Braid:
To create the fishtail braid, divide your hair into two equal sections. Take a small section of hair from the outer edge of the first section and cross it over to the inner side of the other section. Repeat the process on the other side, alternating between the two sections. Continue this process until you reach the end of your hair, and secure the braid with a hair tie.
Tips for the Perfect Fishtail Braid:
- The key to a great fishtail braid is the size of the sections. The smaller the sections, the more intricate and detailed your braid will look.
- For a looser, relaxed look, gently tug on the braid to make it appear fuller.
- If you’re looking for a more bohemian vibe, leave a few strands loose at the front to frame your face.
- A fishtail braid works especially well for longer hair, but you can also adapt it for shorter hair by creating a half fishtail braid or pairing it with other braids.
The fishtail braid adds a touch of sophistication to your winter hairstyle. Its understated beauty makes it ideal for both formal and casual occasions, and it’s the perfect hairstyle to wear when you want to look effortlessly put together.
4. The Halo Braid
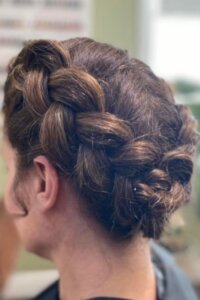
For something a little more unique, the halo braid is a beautiful and regal option. This style creates the illusion of a crown around your head, which can be both stunning and practical. The halo braid is perfect for winter because it keeps your hair in place while looking ethereal and graceful. It’s an ideal choice for a more formal occasion, such as a winter wedding or holiday party, but it can also be dressed down for an everyday look.
How to Style a Halo Braid:
Begin by parting your hair down the middle. Take a small section of hair near your temples on one side and begin a Dutch braid (as described earlier). Once you’ve braided about an inch or two of hair, begin to wrap the braid around the top of your head, securing it behind your ear with bobby pins as you go. Repeat the process on the other side of your head, creating a second braid that also wraps around the crown of your head. Once both braids are in place, tuck the ends under the braid to hide any loose hair, and secure everything with more bobby pins.
Tips for the Perfect Halo Braid:
- If you want a softer halo, pull gently at the braids to loosen them up and add volume.
- For a more formal look, keep the braids tighter and neater, making sure they are close to your scalp.
- Accessorize with a decorative headband or flowers for an added touch of elegance.
- This hairstyle works especially well for longer hair, but you can also create a half halo braid for a more casual look.
The halo braid can give you that fairy-tale, princess vibe that makes you feel special no matter the occasion. It’s a versatile braid that can be adjusted to suit your personal style, and it’s sure to make heads turn wherever you go.
5. The French Braid with a Twist
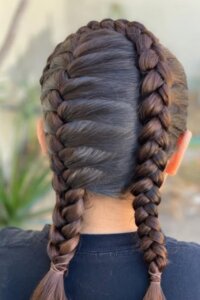
The classic French braid is a timeless hairstyle, but during the winter, why not add a little twist to this traditional look? By combining the elegance of the French braid with a modern touch, you can create a chic yet practical style. A French braid with a twist gives you the same neat and polished effect, but with an updated, trendy vibe.
How to Style a French Braid with a Twist:
Start by parting your hair in the center. Take a small section of hair at the crown and divide it into three equal strands. Begin a regular French braid by crossing the right strand under the middle, followed by the left strand under the middle. As you work your way down, gradually add hair to each section from the sides, incorporating more hair as you go. To add a twist, incorporate small twists of hair along with the regular braiding, especially when bringing in hair from the sides. Once you reach the nape of your neck, secure the braid with a hair tie. For a more dramatic effect, pull on the edges of the braid to add volume and texture.
Tips for the Perfect French Braid with a Twist:
- For a smoother braid, make sure your hair is tangle-free before starting.
- Use a lightweight hair mousse or texturizing spray to add volume and texture to your braid.
- You can make the twist more dramatic by pulling out small strands around your face to frame it softly.
- A French braid with a twist is perfect for any occasion, from a casual day out to a more formal gathering, as it’s both practical and stylish.
This modern twist on the classic French braid is great for keeping your hair tidy and stylish while still looking effortlessly put together.
6. The Side Braid
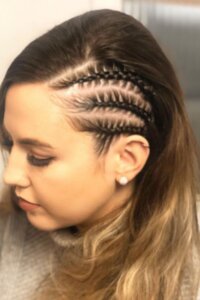
If you’re looking for something simple but still eye-catching, the side braid is a perfect choice. The side braid is one of those hairstyles that works with any outfit, whether you’re wearing a cozy sweater and jeans or a nice dress for a night out. It’s relaxed, chic, and adds an effortless vibe to your look. Plus, it keeps your hair out of your face, making it a practical winter option.
How to Style a Side Braid:
To create the side braid, start by sweeping your hair to one side, either to the left or right, depending on your preference. Divide your hair into three equal sections and begin braiding as you would with a traditional braid. As you continue, make sure to keep the braid loose and relaxed. Once you reach the end, secure it with a hair tie. For added flair, you can gently pull at the braid to make it look fuller, or even curl the remaining loose hair for a soft, beachy effect.
Tips for the Perfect Side Braid:
- For a more boho, relaxed look, loosen the braid a little by pulling on the edges.
- Add texture by curling the ends of the hair that aren’t braided, or even braid small sections of hair from the front to incorporate into the braid.
- This style works well on all hair types—straight, wavy, or curly.
- To make the braid last longer, use a bit of hairspray to set it in place.
The side braid is effortless and stylish, making it a versatile option for casual winter days or when you just want something quick and pretty.
7. The Double Dutch Braids
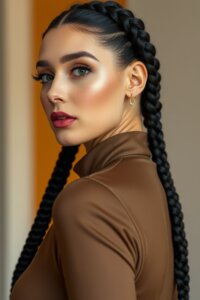
If you’re looking for a braid that’s bold, fun, and practical, double Dutch braids are a fantastic option. This style works especially well for colder weather because it keeps your hair tightly secured while adding a touch of athletic chic. Double Dutch braids are edgy and trendy, and they can give you that sporty vibe while still looking stylish.
How to Style Double Dutch Braids:
Start by parting your hair down the middle to create two even sections. Begin by braiding each side using the Dutch braid technique, as we discussed earlier. For each side, cross the right section under the middle, followed by the left section under the new middle. Keep your braids tight and close to the scalp for a neat and structured look. Once both braids are done, secure them at the ends with hair ties. For extra flair, you can add small accessories, like colorful hair ties or clips, at the ends of the braids.
Tips for the Perfect Double Dutch Braids:
- To make the braids stand out more, gently pull on the edges of the braids to loosen them and create more volume.
- Double Dutch braids work great for people with medium to long hair, but you can adjust the style to work with shorter hair by braiding sections at the front of your hair.
- To ensure the braids stay neat and tight, use a good styling gel or mousse to smooth down any flyaways.
- Add a bit of sparkle or fun hairpins to the braids for a festive touch if you’re going out.
Double Dutch braids are a great winter hairstyle that gives you a bold and sporty edge while keeping your hair intact and away from your face.
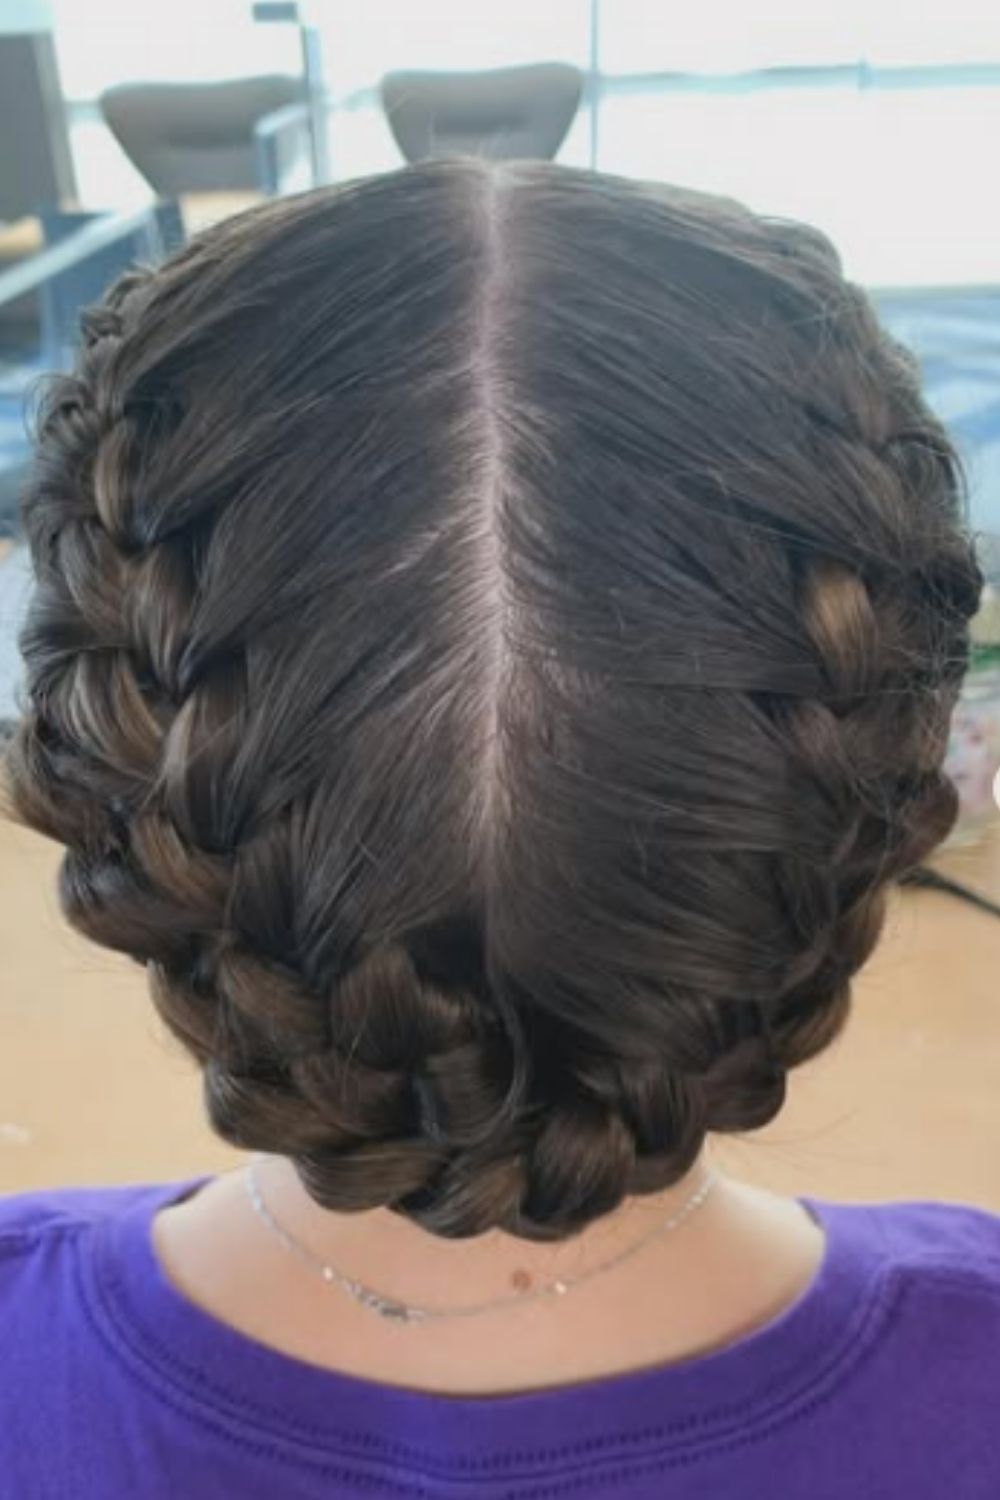
8. The Crown Braid
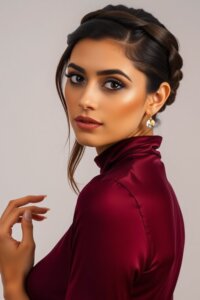
The crown braid is a perfect blend of sophistication and practicality. It’s an elegant hairstyle that’s easy to wear for winter events but is just as lovely for a relaxed day. The style creates a “crown” around your head, which is ideal for keeping your hair in place while also looking polished. It’s the ideal braid if you want something different yet classy.
How to Style a Crown Braid:
Start by parting your hair in the center and creating two equal sections. Begin with one side by taking a small section of hair near the front and starting a regular braid, working from the front to the back of your head. As you braid, keep bringing in more hair from the front, until you’ve braided around the crown of your head. Once the braid reaches the opposite side, secure it with bobby pins to hold it in place. Repeat the same process on the other side, joining both braids at the back to form a crown. Tuck the ends under the braids to hide them and pin them in place.
Tips for the Perfect Crown Braid:
- To add volume and make your crown braid more regal, pull on the edges of the braids once they are finished.
- For a more relaxed crown braid, leave a few strands loose in front to frame your face.
- If you have layered hair, it might be a good idea to use a texturizing spray to ensure the braid stays neat and secure throughout the day.
- This braid works best for medium to long hair but can be adapted to shorter hair by making a half crown.
The crown braid will definitely make you feel like royalty while keeping your hair neatly styled and out of the way in colder weather. It’s the perfect winter hairstyle if you want something elegant and functional.
9. The Infinity Braid
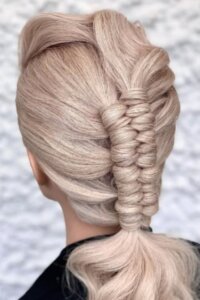
If you’re looking for a braid that’s both unique and elegant, the infinity braid is a stunning choice. This intricate weaving technique creates a looped, infinity-symbol effect that sets it apart from more traditional braids. It’s an eye-catching style that works for both casual and formal occasions, making it a perfect winter hairstyle for those who love detail and creativity.
The infinity braid is great for medium to long hair, and while it may look complicated, it’s easier than it seems once you get the rhythm down. Based on my overall experience, this style holds up beautifully throughout the day, giving your hair a structured yet effortless look.
How to Style an Infinity Braid:
- Start with a small section: Take a small portion of hair from one side and separate it from the rest. This will be your base strand to work with.
- Weave in a figure-eight motion: Using a thin section of hair, loop it around the base strand in a continuous figure-eight pattern. Keep the sections tight for a more defined look.
- Add hair as you go: Gradually incorporate more hair into the looping strand to create a seamless and flowing braid.
- Secure and style: Once you reach the desired length, tie it off with a small elastic and lightly tug on the braid to give it a fuller, more voluminous appearance.
Tips for the Perfect Infinity Braid:
- Use a light texturizing spray before braiding to add grip and prevent slipping.
- For a soft, romantic look, leave out a few face-framing strands.
- This braid pairs beautifully with accessories like pearl pins or delicate hair clips for an added touch of elegance.
- If you’re new to this style, practice with a small section of hair before trying a full braid.
The infinity braid is perfect for anyone wanting a standout hairstyle that blends intricate detail with effortless beauty. Whether you’re dressing up for a winter event or simply want to elevate your everyday look, this braid is a gorgeous option.
10. The Rope Braid
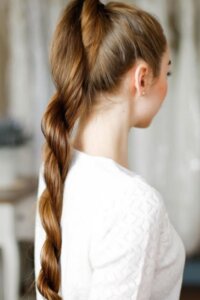
The rope braid is a simple yet chic style that has a lot of charm, making it an excellent winter hairstyle for anyone who enjoys experimenting with different types of braids. It’s easy to do, and it’s an excellent choice when you want a relaxed, slightly textured look. The rope braid also holds up well in colder weather, keeping your hair in place and looking stylish.
How to Style a Rope Braid:
To begin, divide your hair into two even sections. Take one section of hair and twist it tightly in one direction. Then, twist the other section of hair in the opposite direction. Once both sections are twisted, cross them over each other like you’re twisting a rope. Continue twisting them together until you reach the end of your hair. Secure it with a hair tie. You can pull on the edges of the braid to make it looser for a more casual look, or keep it tighter for a sleeker finish.
Tips for the Perfect Rope Braid:
- This braid works best with medium to long hair, but shorter hair can still manage it by creating a smaller section or combining the style with other braids.
- If your hair is fine, adding a bit of mousse or texturizer before braiding will give it more volume and texture.
- You can make the braid look more rustic and laid-back by pulling some strands loose, or keep it neat and controlled for a more polished appearance.
- To keep the braid from unraveling throughout the day, add a little bit of hairspray for extra hold.
The rope braid is a simple, no-fuss style that still looks beautifully intricate and perfect for the winter months.
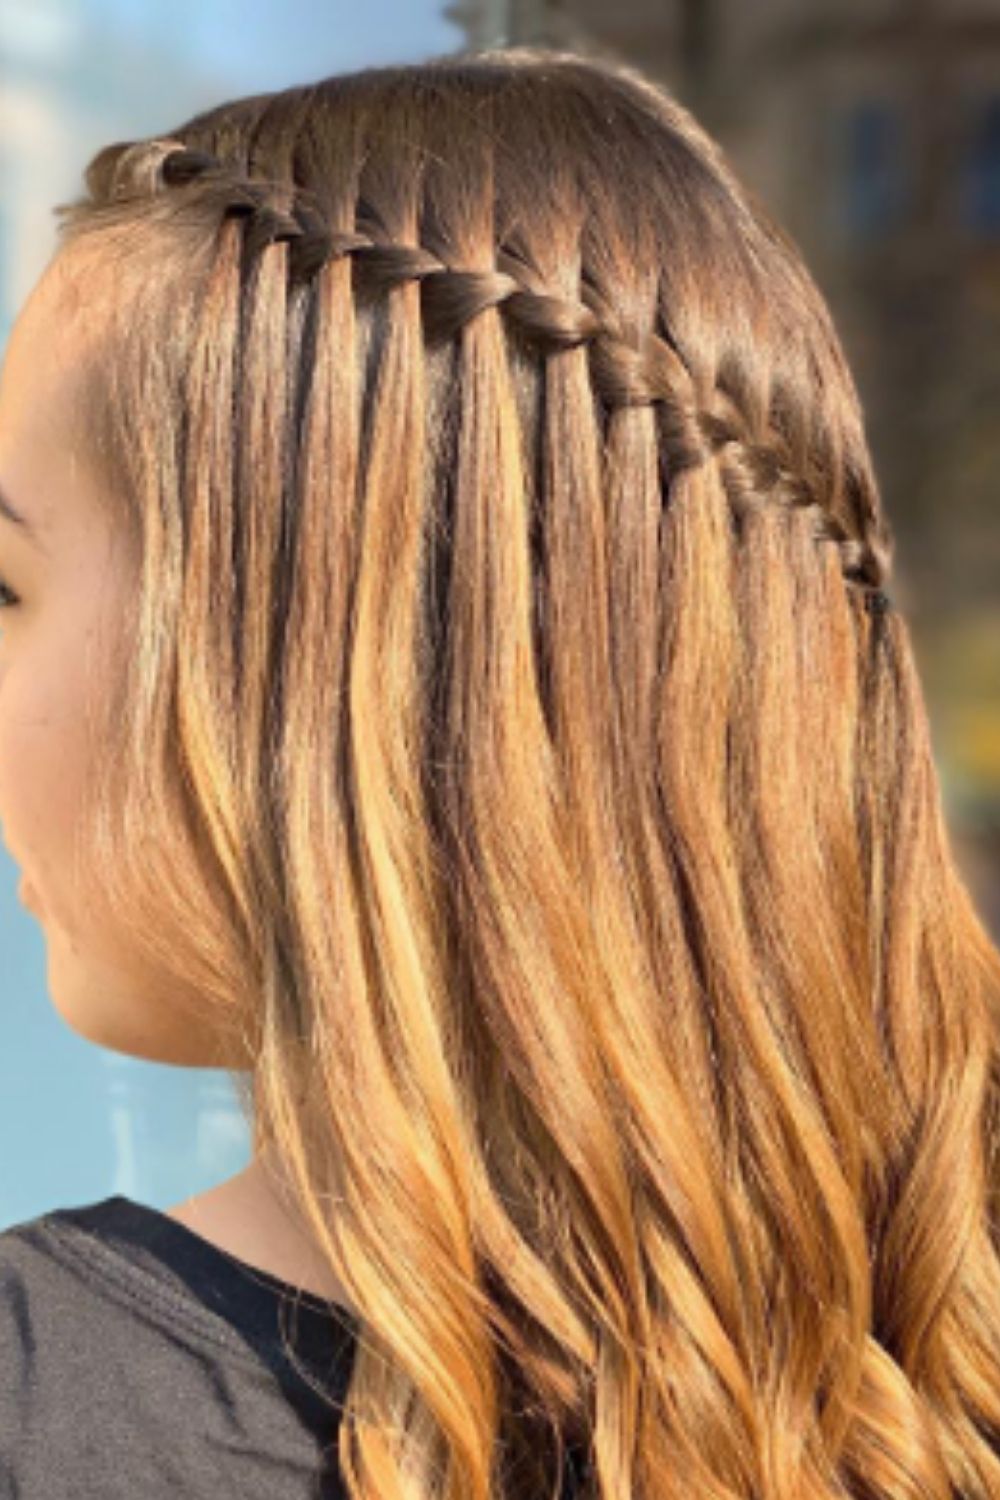
11. The Waterfall Braid
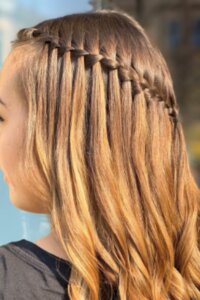
The waterfall braid is a stunning hairstyle that combines the beauty of a braid with the elegance of flowing, loose hair. It’s a beautiful option for winter events or days when you want to add a little glamour to your look. The waterfall braid is particularly gorgeous if you have layered hair, as the flowing locks give the braid a soft, cascading effect.
How to Style a Waterfall Braid:
Start by taking a small section of hair at the front of your head. Begin a traditional braid, but instead of crossing over all three strands, allow the bottom strand to fall free and replace it with a new piece of hair from the top. Continue this process as you braid down the side of your head, making sure to let strands of hair fall down in a “waterfall” effect. Once you reach the back of your head, secure the braid with a bobby pin and blend the ends into the rest of your hair. You can either leave the rest of your hair down for a soft, romantic look, or tie it into a ponytail or bun for a more structured style.
Tips for the Perfect Waterfall Braid:
- This braid works best with layered hair, as it enhances the cascading effect.
- You can use a curling iron to create soft waves before braiding for a more textured, romantic look.
- If you’re worried about your braid unraveling, try securing it with a clear elastic band underneath the section, and then pin it into place.
- To make the waterfall effect more dramatic, you can create a side part and start the braid further back.
The waterfall braid is a beautiful winter hairstyle that adds an element of elegance and softness, making it ideal for colder weather when you still want to look chic.
12. The Boho Braid
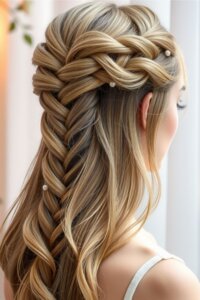
The boho braid is perfect for those who love a free-spirited, relaxed style. This braid embraces imperfections and is meant to look effortless. It’s the ideal winter hairstyle for days when you want something low-maintenance but still stylish and on-trend. Whether you’re going to brunch with friends or attending a laid-back winter gathering, the boho braid gives you that carefree, bohemian look.
How to Style a Boho Braid:
Begin by creating loose waves with a curling iron or wand for a textured, beachy look. Next, take a small section of hair from the front and begin braiding it loosely. As you work your way down, be sure to keep the braid soft and relaxed—don’t worry about keeping it perfect! You can incorporate some twists or fishtail sections for added texture, or add in a few hair accessories like a decorative pin or flower for extra flair. Once you reach the end, secure the braid with a soft elastic band, and gently pull at the edges to loosen it up even more.
Tips for the Perfect Boho Braid:
- Keep the braid loose and relaxed for that effortless boho vibe.
- Add accessories like small flowers, beads, or hairpins to enhance the bohemian feel.
- To give the braid extra texture, spray some sea salt spray or light hairspray for volume.
- If you want to make the look a bit more polished, curl the hair before braiding for a smoother finish.
The boho braid is perfect for adding a touch of laid-back style to your winter look without sacrificing comfort or ease.
13. The Ladder Braid
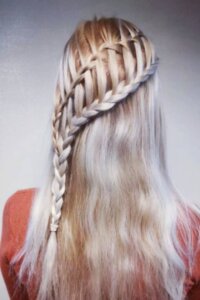
If you’re looking for a unique and intricate braid that stands out, the ladder braid is a stunning choice. It’s a creative take on traditional braiding techniques, designed to add dimension and visual interest to your hairstyle. This braid gets its name from the way the strands interweave, creating a “ladder-like” effect. It’s perfect for special occasions, but it also works beautifully as an everyday statement style.
The ladder braid is great for medium to long hair and can be styled in many ways—whether as a half-up braid, a ponytail accent, or a full braided style. From my own personal experience, this braid always turns heads, and once you get the technique down, it’s surprisingly easy to recreate.
How to Style a Ladder Braid:
- Create a base section: Start by parting your hair and sectioning off a portion to work with. If you want a side ladder braid, take a section from one side of your head.
- Start a regular three-strand braid: Begin with a classic braid near the top of your section. This will act as the “rail” for your ladder.
- Add sections for the ladder effect: As you braid, pull small strands from the loose hair on one side and weave them through the braid before letting them fall. Repeat this process down the length of your hair.
- Secure and set: Once you reach the end, tie it with an elastic and gently pull on the strands for a softer, more voluminous look.
Tips for the Perfect Ladder Braid:
- This braid works best on smooth, detangled hair, so brush thoroughly before starting.
- Use a light-hold styling cream or serum to prevent flyaways and keep the braid looking sleek.
- If you want a bolder effect, make two ladder braids side by side and connect them at the end.
- For an extra touch of glamour, weave in ribbon, beads, or hair rings for added detail.
The ladder braid is a fresh and eye-catching alternative to classic braids, making it a must-try for anyone who loves experimenting with new styles. Whether you wear it loose and flowing or as part of an updo, this braid is sure to elevate your look with its intricate beauty.
14. The Twisted Braid Bun
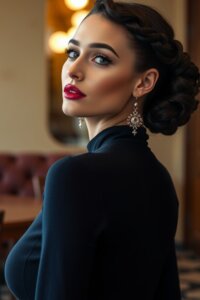
If you’re after a hairstyle that radiates elegance with a touch of sophistication, the twisted braid bun is an ideal choice for both formal and semi-formal occasions. This style offers the classic updo look but with a twist—literally! It combines the neatness of a bun with the texture and charm of a braid, creating a polished yet unique look. This style works particularly well for brides or anyone looking to add a refined yet trendy element to their look.
The twisted braid bun is versatile and can easily be adapted for any occasion. Whether you’re attending a wedding, a night out, or just want to add some flair to your everyday routine, this style is the perfect blend of practicality and style.
How to Style a Twisted Braid Bun:
- Prep your hair: Start by adding some texture to your hair. If you have straight hair, using a curling iron or texturizing spray will give you more volume and hold for the braid.
- Divide your hair: Create a deep side part and divide your hair into two sections—one for the twist and one for the braid.
- Create a braid: Start by braiding one side of your hair into a regular three-strand braid, or use a fishtail braid for more complexity.
- Twist and wrap: Take the remaining hair on the other side, twist it tightly, and wrap it around the base of the braid, creating a secure bun. Pin it into place with bobby pins, making sure it’s tight but not too stiff.
- Secure with hairspray: Once your bun is in place, use a flexible hold hairspray to keep everything intact without making it too firm. If you prefer a softer look, gently tug at the sides of the braid and bun to give it a more relaxed feel.
Tips for the Perfect Twisted Braid Bun:
- For extra volume, pull some hair from the crown and tease it lightly before braiding for a fuller effect.
- Add accessories: A few decorative pins, flowers, or a sparkly hair clip can elevate this look, making it perfect for weddings or elegant evening events.
- Play with texture: For a more boho vibe, leave some pieces of hair loose around your face for a softer, more romantic finish.
The twisted braid bun is the ultimate fusion of elegance and ease, offering a sophisticated option for anyone looking to style their hair in a refined yet modern way. Whether you’re going for a sleek and neat bun or a more relaxed, messy version, this hairstyle will always make a stunning impression.
15. The Double Braid Bun
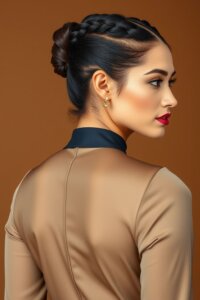
The double braid bun is a fun and playful winter hairstyle that combines two braids and a bun for a look that’s both cute and practical. This style is great for days when you want to keep your hair neat and secure but also want to add a little fun to your winter look. Whether you’re running errands or meeting up with friends, the double braid bun offers a practical yet stylish way to wear your hair.
How to Style a Double Braid Bun: Start by dividing your hair down the middle to create two equal sections. Braid each section into a simple three-strand braid. Once the braids are finished, twist each braid into a bun and secure them with hair ties or bobby pins. You can make the buns as tight or as loose as you like depending on the vibe you want—tight for a more structured look, or loose for a more relaxed, bohemian feel. Optionally, you can pull out a few strands for a more casual look.
Tips for the Perfect Double Braid Bun:
- To make the buns fuller, gently pull at the braids before twisting them into a bun.
- If you have layers or bangs, allow some pieces of hair to fall loose for a more carefree, playful look.
- For extra hold and volume, apply a light hairspray before braiding.
The double braid bun is a fun, functional winter hairstyle that’s perfect for keeping hair out of your face while still making a statement. It’s an excellent choice for active days or when you want to add a little personality to your look.
Which Braid is Your Favorite Winter Look?
As we’ve explored some of the most gorgeous winter braid styles, I’d love to hear which one stole your heart! Have you tried any of these looks yet, or do you have a favorite braid that didn’t make the list? Let me know in the comments below, and be sure to include your name and location so I can easily find your comment. Don’t be shy, share your experiences, tips, or how you love styling your hair during the winter season!
With so many beautiful options to choose from, you’re sure to find the perfect winter braid that fits your style and needs. Experiment with these looks and let me know which one works best for you! Happy braiding!

I’m Gemma, a passionate lifestyle blogger sharing my creative world with you. Gemitaliano.com is my little corner of the internet, glad you’re here.


